Install LEMP stack on Ubuntu Linux

One of our prerequisite to proceed with WordPress deployment in Public Clouds is to have a Linux Server with correct packages installed and configured.
In my case I will use Ubuntu Server as a Operating System.
What is LEMP?
LEMP stands for: Linux, Nginx, MySQL and PHP.
All those components are necesary to install WordPress.
Update and Upgrade your Ubuntu Server
Once Ubuntu Server is installed it is necessary to update and upgrade the packages on your Server.
Simply run the following command in the terminal:
sudo apt update && sudo apt upgrade -y
LEMP packgaes installation
Once the packages are updated we can proceed with components installation.
sudo apt update
sudo apt install nginx php-fpm php-mysql mysql-server
You will be asked to install additional components.
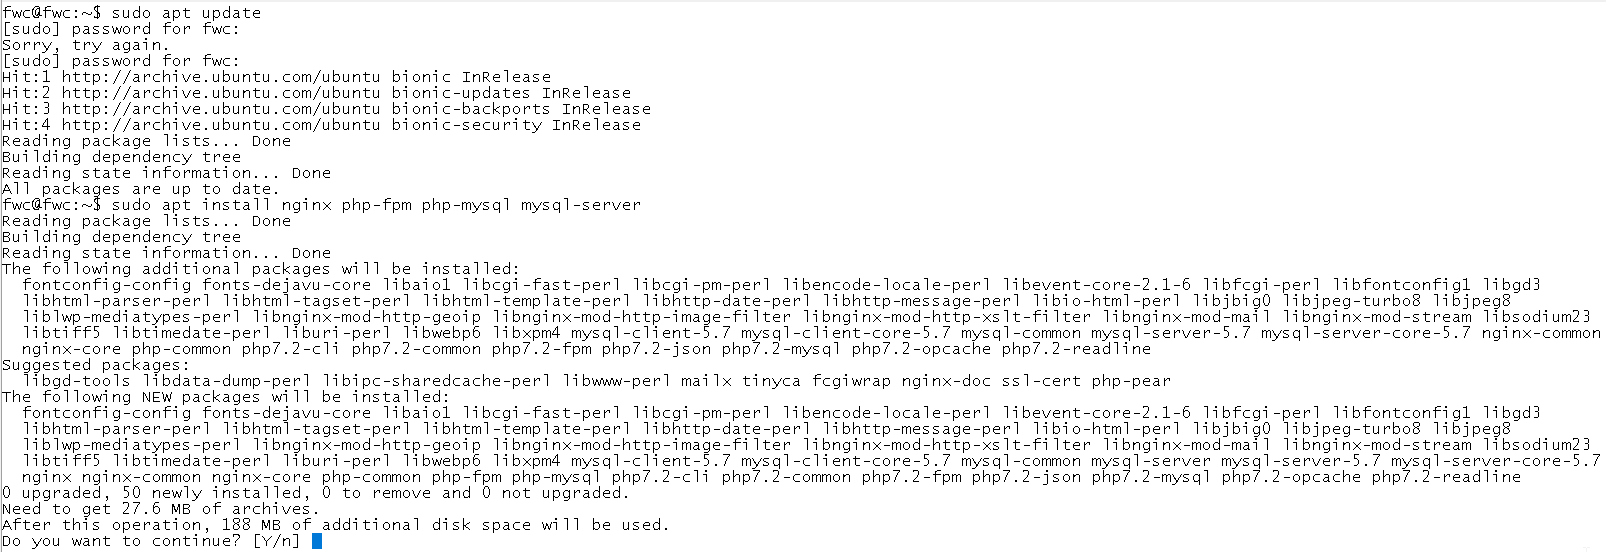
Enter Y to proceed. Depending on your network connectivity it might take few minutes to proceed.
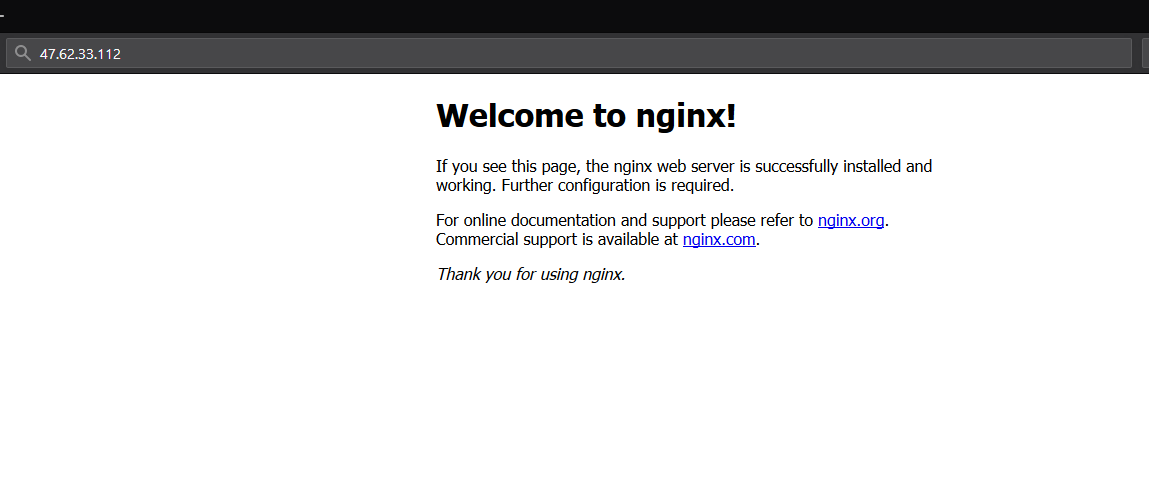
Our webserver Nginx is up and running.
MySQL
Next step is the MySQL configuration. As this is just a showcase installation we will run MySQL as a root account and configure it.
sudo mysql_secure_installation
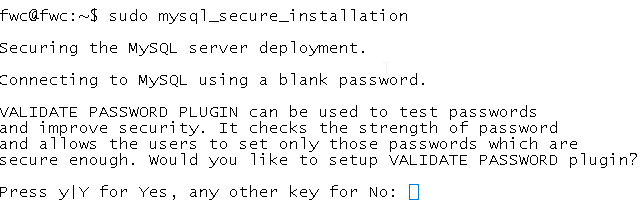
We will configure Strong password policy.

Enter password according to configured password policy.

We can remove anonymous users for greater security.

We will remove root remote login.

The very last step is to remove test databases.

To enter MySQL we type sudo mysql.
To install WordPress we would have to create a MySQL database. We will skip this step in this post.
PHP & Nginx
The last step to have fully functional LEMP stack we will create a php.ini file and check if all PHP extensions are present.
sudo touch /var/www/html/info.php
Next step is to edit file. Type sudo nano /var/www/html/info.php to edit the file.
<?php
phpinfo();
?>
Press CTRL+X to exit and Y to save the file.
Next step is to enable PHP extensions in Nginx configuration.
Edit file
sudo nano /etc/nginx/sites-available/default
Use the following configuration as a basic one.
server {
        listen 80;
        root /var/www/html;
        index index.php index.html index.htm index.nginx-debian.html;
        server_name _;

        location / {
                try_files $uri $uri/ =404;
        }

        location ~ \.php$ {
                include snippets/fastcgi-php.conf;
                fastcgi_pass unix:/var/run/php/php7.2-fpm.sock;
        }

        location ~ /\.ht {
                deny all;
        }
}
Once the changes are done we can check the configuration by running a command sudo nginx -t and later on if config is fine use sudo systemctl reload nginx to restart Nginx.
Now when you navigate to your webserver you can check if info.php shows all PHP configuration.
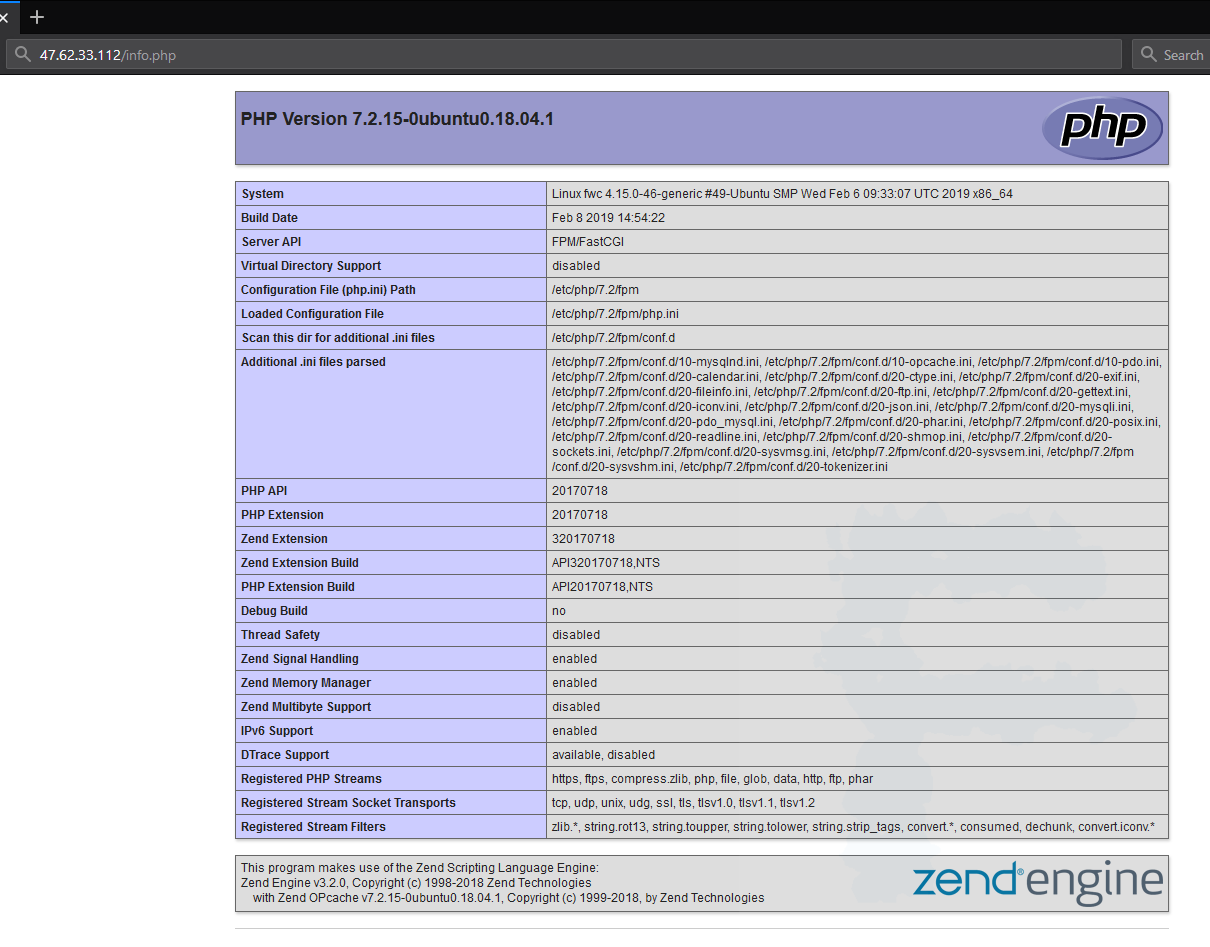
Configuration is correct. For safety reasons I suggest to remove info.php file.
sudo rm /var/www/html/info.php
Summary
The web server preparation is complete. You can now install WordPress on your Ubuntu Server.